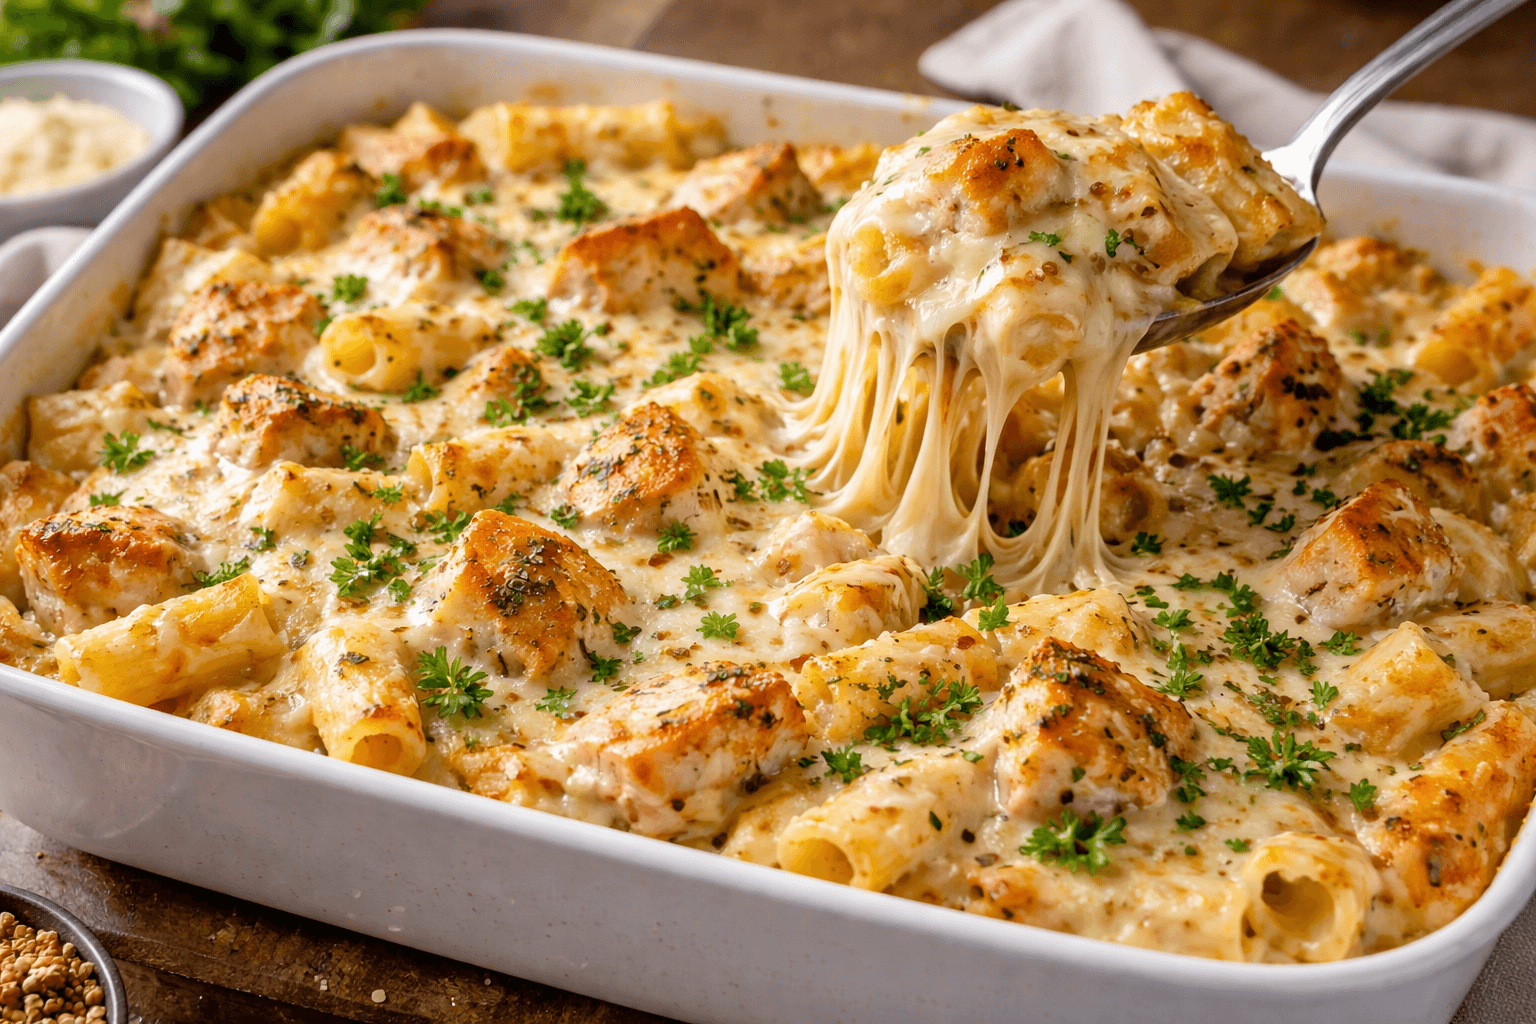
This easy Chicken Alfredo Pasta Bake is the perfect 30 minute dinner when you're craving something creamy, cheesy, and comforting. Unlike traditional stovetop Alfredo, this baked version takes it to the next level with a bubbly mozzarella topping and tender, golden chicken. We've combined the convenience of a casserole with the high end appeal of a restaurant style meal. Whether you're a beginner cook or a busy parent, this simple homemade recipe delivers a high protein, photo worthy dinner your whole family will love.

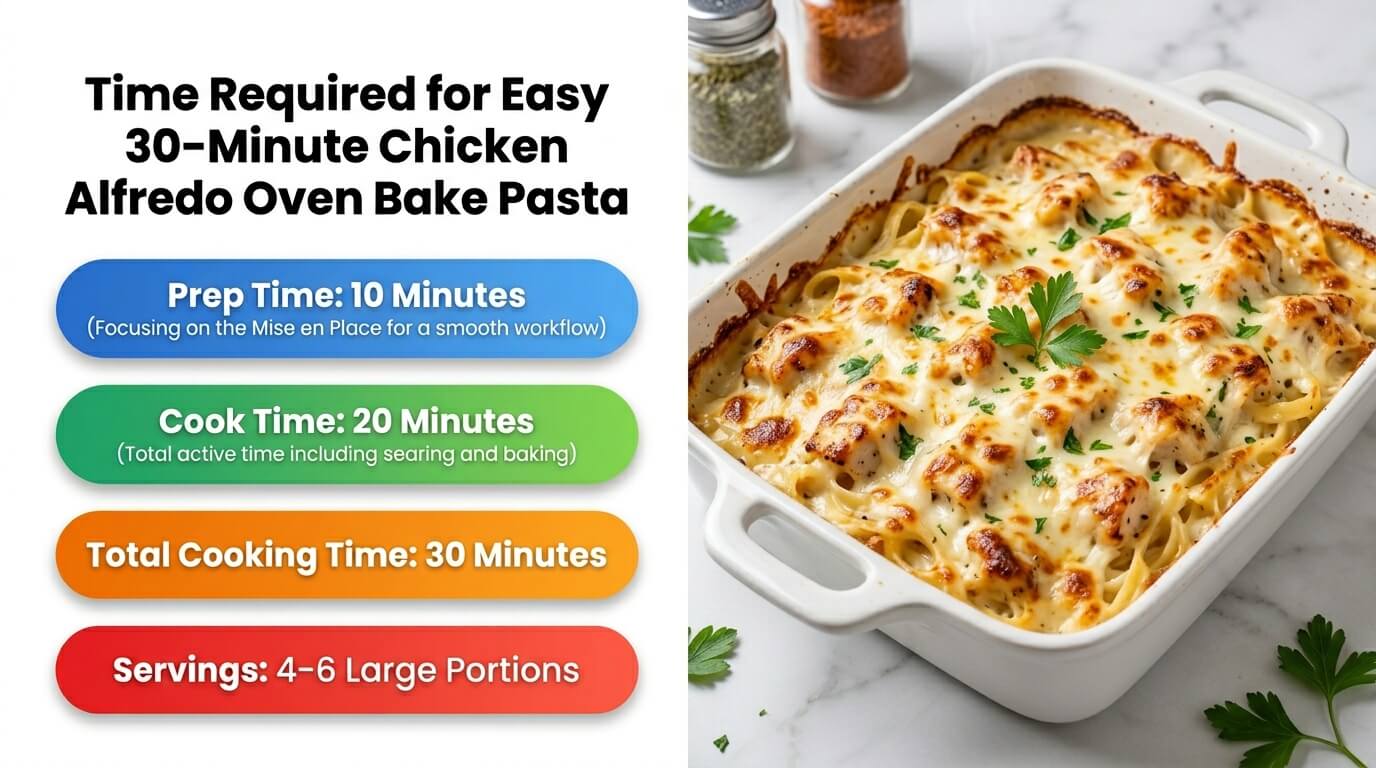
Time Required for Easy 30 Minute Chicken Alfredo Oven Bake Pasta
Ingredients for Easy 30 Minute Chicken Alfredo Oven Bake Pasta
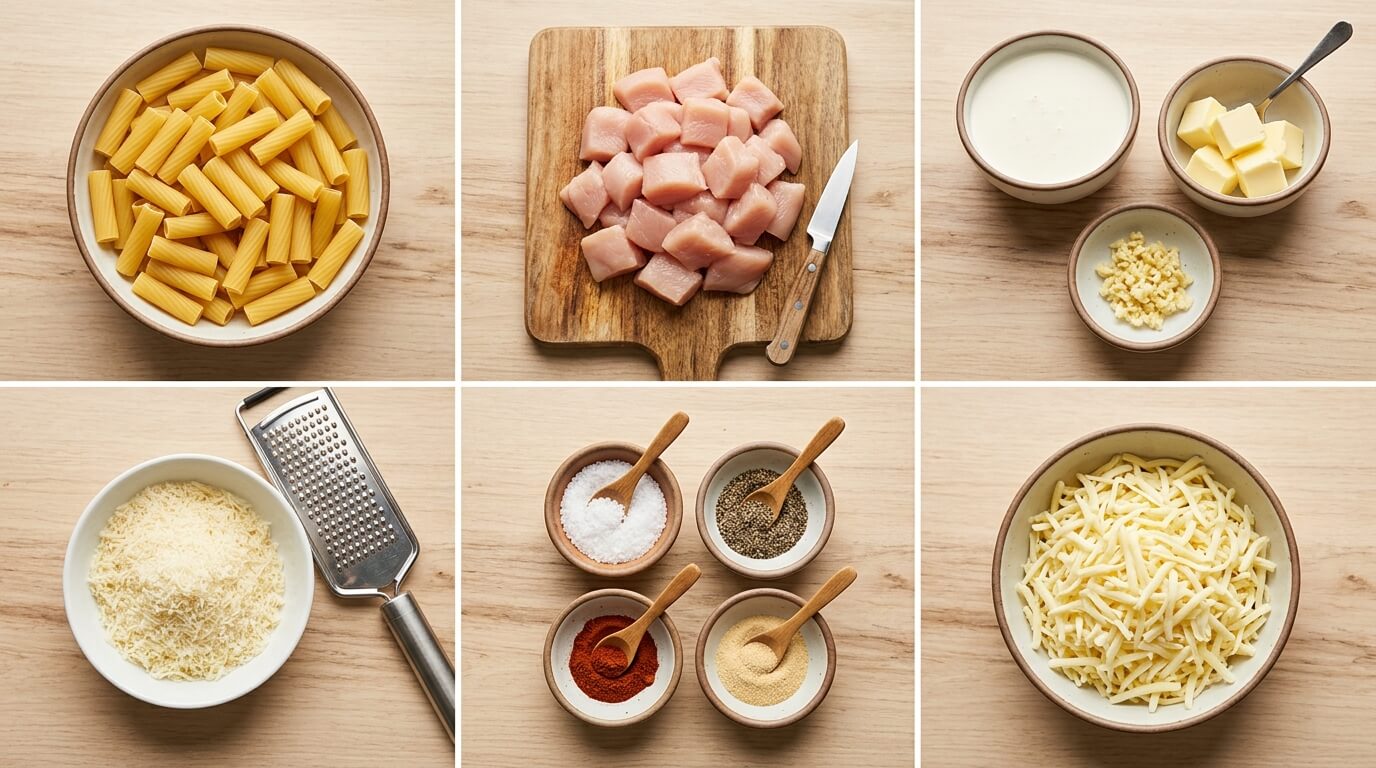
The Pasta: 12 oz Rigatoni or Penne (ridges help the sauce "lock" in).
The Protein: 1 lb Chicken Breasts, cut into bite sized pieces.
The Sauce Base: 2 cups Heavy Cream and 4 tbsp Unsalted Butter.
The Cheese Duo: 1 cup Freshly Grated Parmesan (for the sauce) and 1.5 cups Shredded Mozzarella (for the crust).
Aromatics: 3 cloves Garlic (minced) and 1 tsp Italian Seasoning.
The Liquid Gold: 1/2 cup Reserved Pasta Water.
Garnish: Fresh Parsley and a dash of Paprika for a Food design glow.
Equipment Needed
9x13 Baking Dish: The standard size for the perfect pasta to cheese ratio.
Large Pot: For boiling the pasta.
Large Skillet: For the chicken and sauce.
Whisk: To ensure a smooth, emulsified sauce.
Box Grater: For the best melting cheese.
Step By Step Instructions
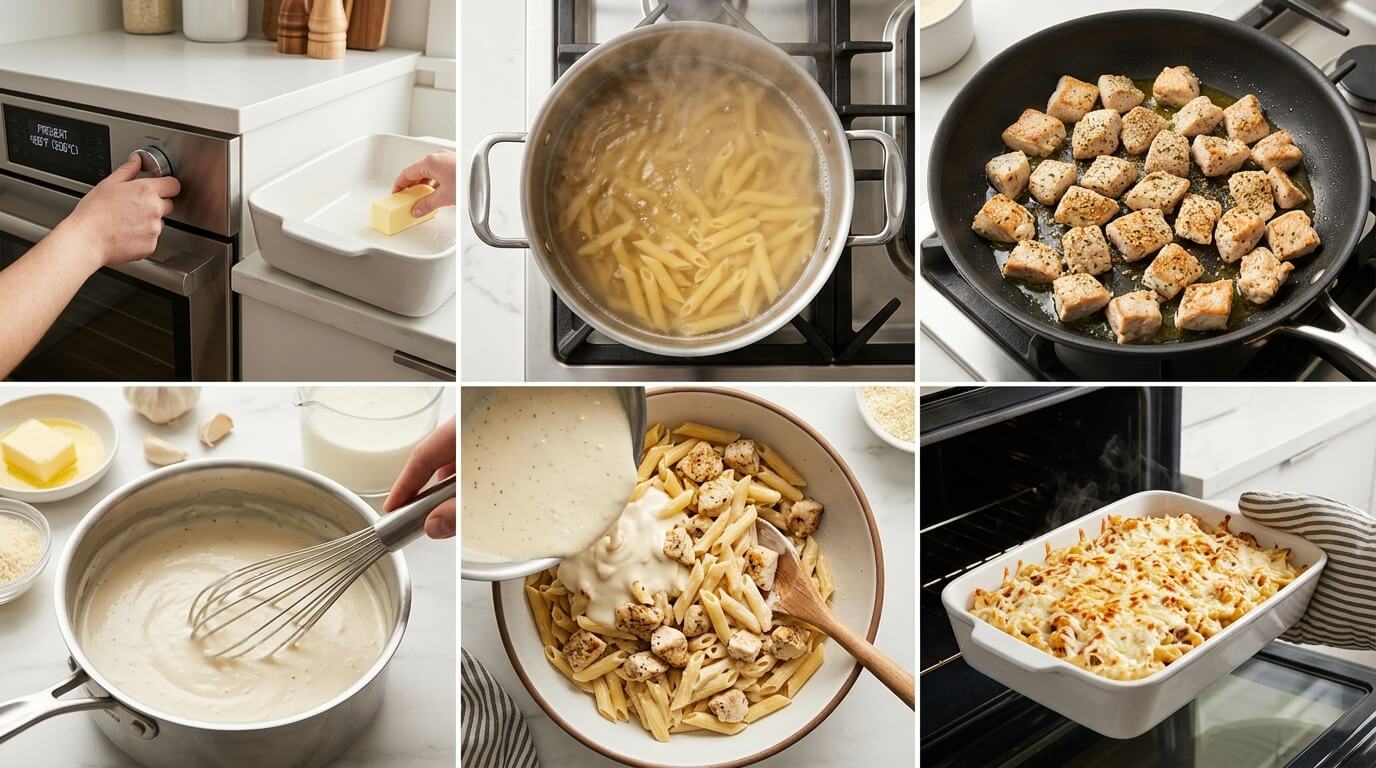
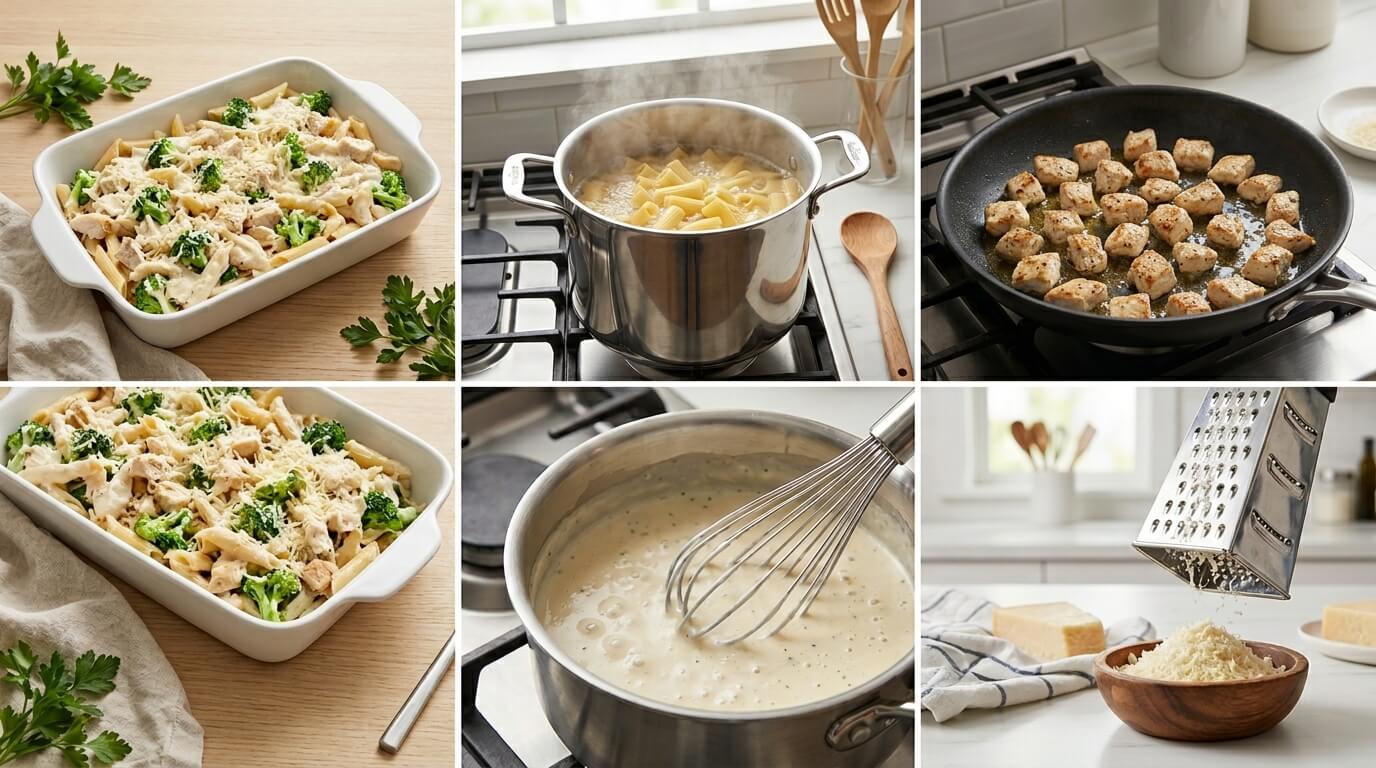
Step 1: The Al Dente Foundation (The Absorption Prep)
Cooking the pasta correctly is the difference between a gourmet bake and a mushy casserole.
The Under Cook Technique: Always boil your pasta for 2 full minutes less than the "Al Dente" time on the box. The noodles should feel slightly too firm to eat. This is intentional; they will act like a sponge in the oven, soaking up the garlic Parmesan cream sauce to become perfectly tender.
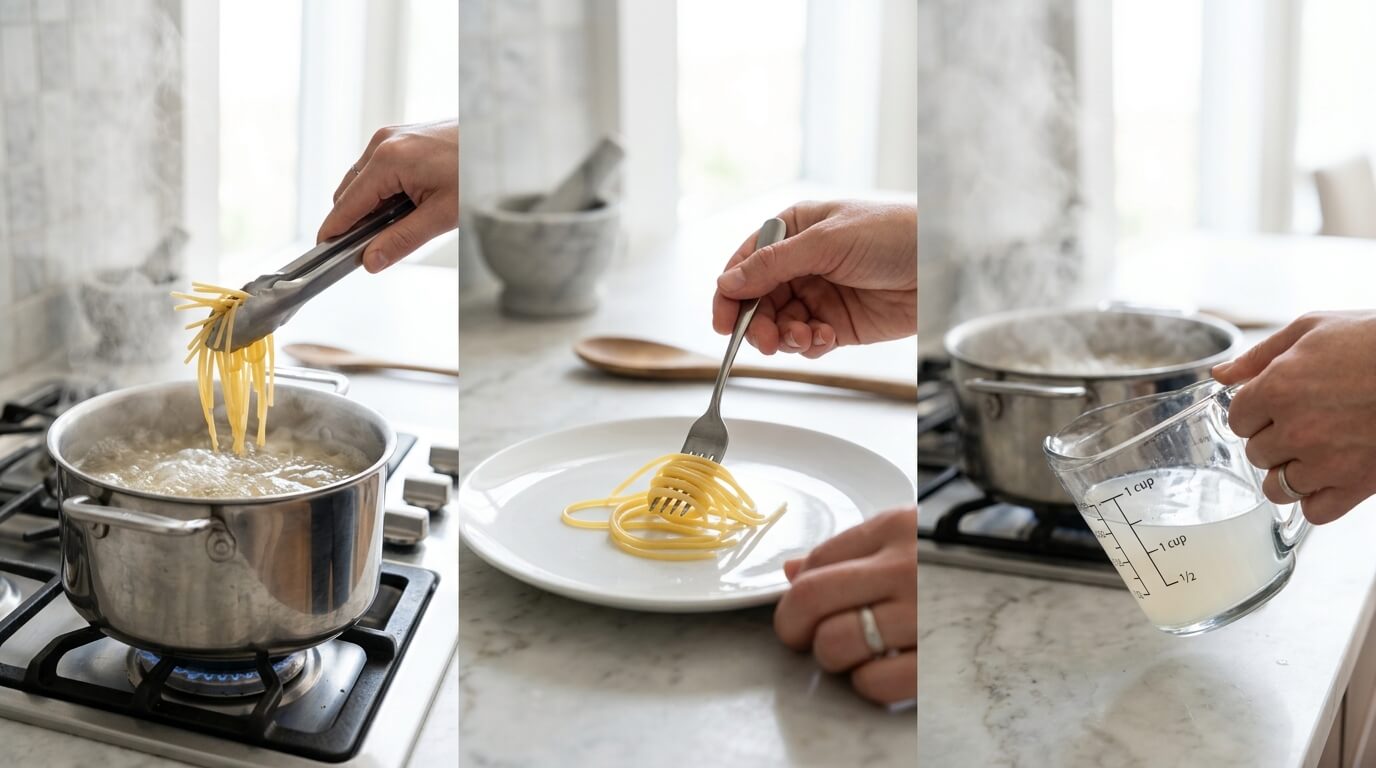
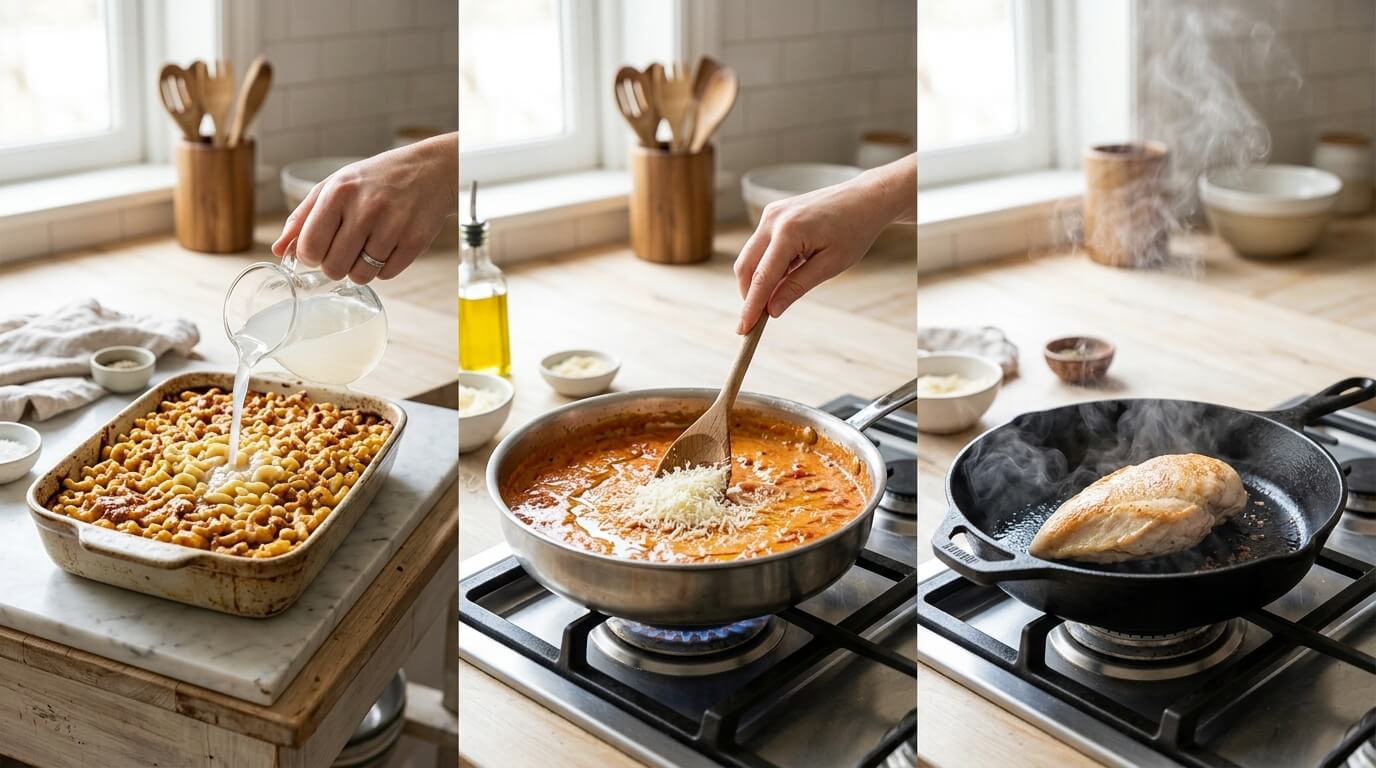
Liquid Gold: Before draining, dip a glass measuring cup into the pot to save 1/2 cup of the starchy pasta water. This "Liquid Gold" is the secret to keeping the sauce emulsified and preventing it from breaking or becoming oily during the high heat bake.
Step 2: The Golden Chicken Sear (The Flavor Development)
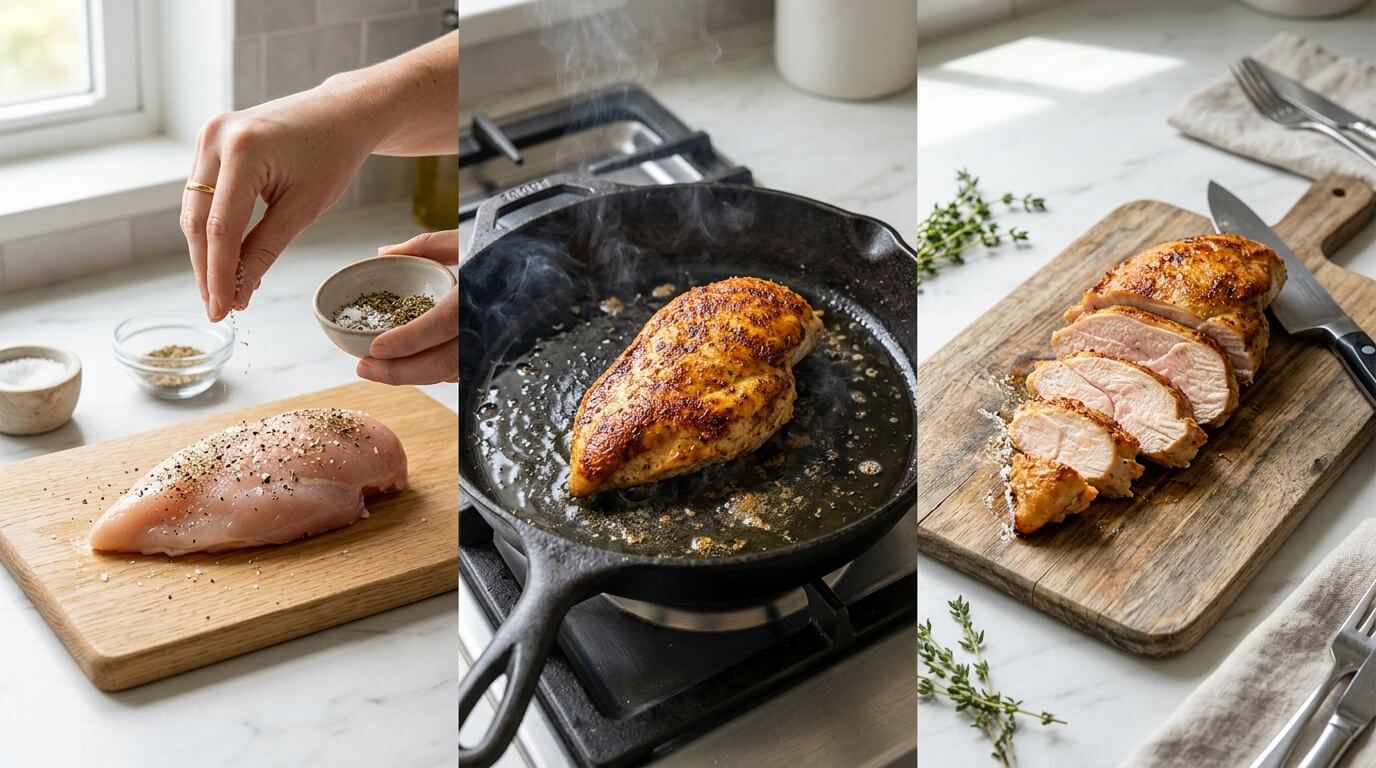
We want to achieve a "bronzed" look on the meat to enhance the visual Food presentation contrast.
Searing vs. Cooking: Use a 12 inch heavy bottomed oven safe skillet. Season the chicken generously and sear it over medium high heat.The goal is a deep golden brown crust.
The Oven Finish: Do not worry about cooking the chicken through. By removing it while the center is still slightly pink, you ensure it stays juicy and tender after the 20 minute total process, rather than becoming dry and rubbery.
Step 3: The Garlic Cream Sauce (The Velvet Base)
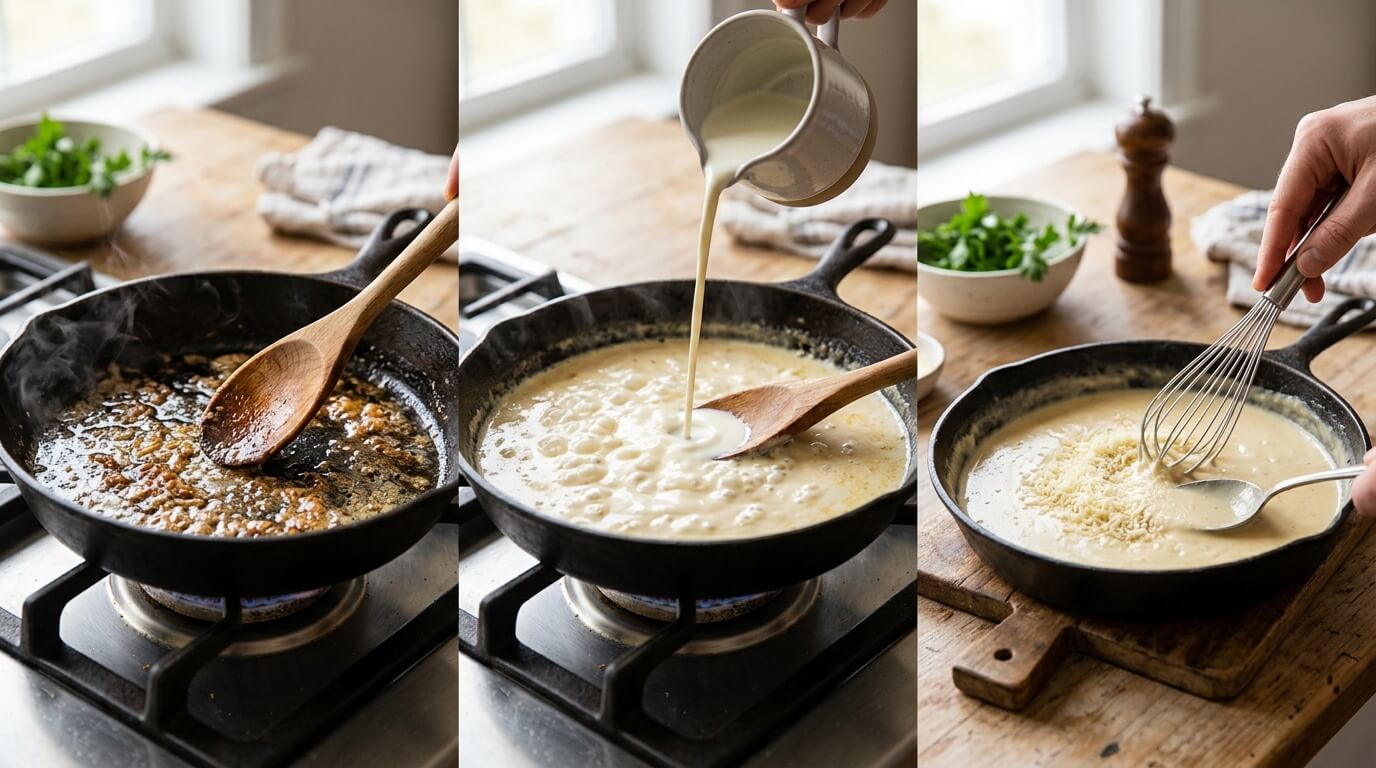
Creating a stable emulsion ensures the sauce doesn't "separate" into a layer of oil in the oven.
Deglazing the Pan: Use the butter to scrape up the "fond" (the brown bits) left by the chicken. This infuses the sauce with deep, savory notes.
The Simmer: Pour in the heavy cream and let it reach a gentle simmer. You want it to reduce just enough to coat a spoon.
The Off-Heat Whisk: Remove the skillet from the burner before adding the freshly grated Parmesan. Whisking cheese into a boiling sauce causes clumping; doing it off heat ensures a shimmering, smooth pool of gold.
Step 4: The Assembly & Mozzarella Crust (The Moisture Lock)
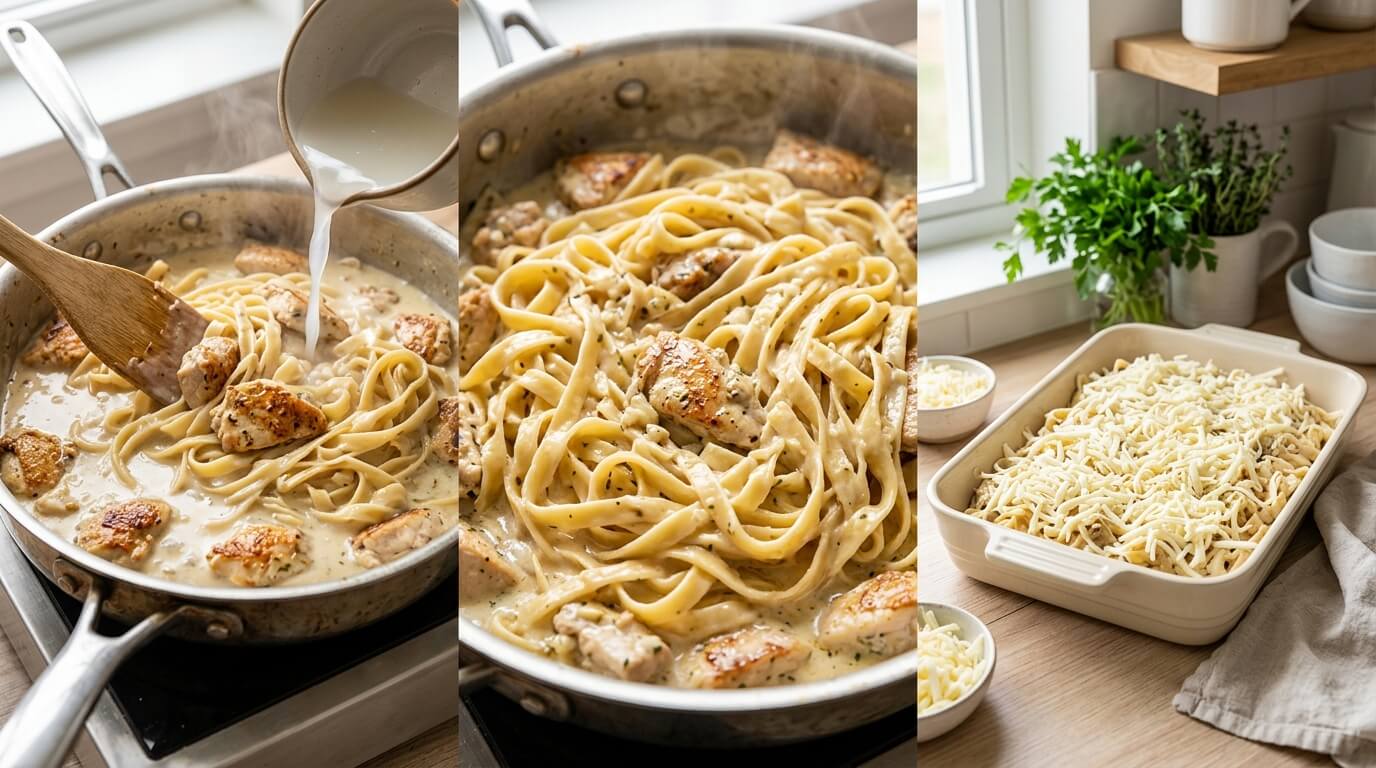
This stage is about preparing the dish for the dry heat of the oven.
The Glossy Toss: Combine the under cooked pasta, seared chicken, and sauce. Now, stir in your reserved pasta water one tablespoon at a time. The mixture should look slightly "too wet" or loose. This extra moisture will evaporate in the oven, leaving you with a perfectly creamy finish.
The Mozzarella Shield: Top with a thick, even layer of freshly shredded mozzarella. This acts as a thermal blanket, protecting the cream sauce from direct heat so it doesn't break.
Step 5: The "Food decoration" Bake (The Visual Finale)
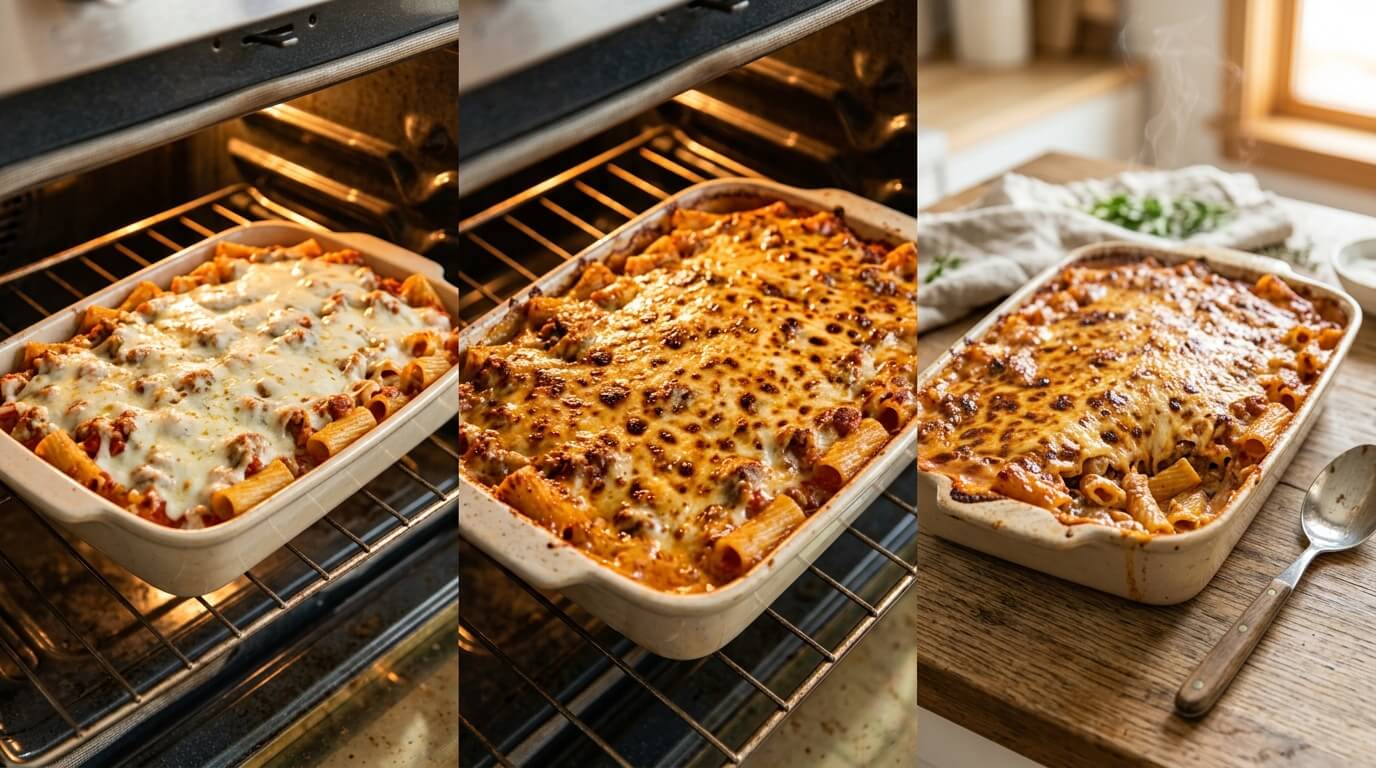
The final stage is all about achieving the perfect "Family Favorite" golden glow.
High Heat Bubble: Bake at 400°F (200°C) on the middle rack. This high temperature ensures the cheese bubbles and the pasta finishes cooking before the sauce can dry out.
The Broiler Finish: For a true restaurant style look, switch to the broiler for the final 60 seconds. Watch it closely! You are looking for those signature deep brown "speckles" that signal a perfectly caramelized mozzarella crust.
The Rest: Let the dish sit for 5 minutes after removing it from the oven. This allows the sauce to thicken slightly and "anchor" to the noodles for a perfect plate presentation.
Common Mistakes And How to Fix Them
Dry Pasta Bake: If the pasta absorbs all the sauce, the dish becomes dry.
Fix: Always add that 1/2 cup of reserved pasta water before baking to provide an extra moisture buffer.
Oily Sauce: Using pre shredded cheese can lead to an oily separation.
Fix: Always use freshly grated cheese blocks for a smooth emulsion.
Rubbery Chicken: Over searing the chicken initially.
Fix: Just get a quick golden color on the outside; the oven heat will do the rest of the work.
How to Serve & Present Chicken Alfredo
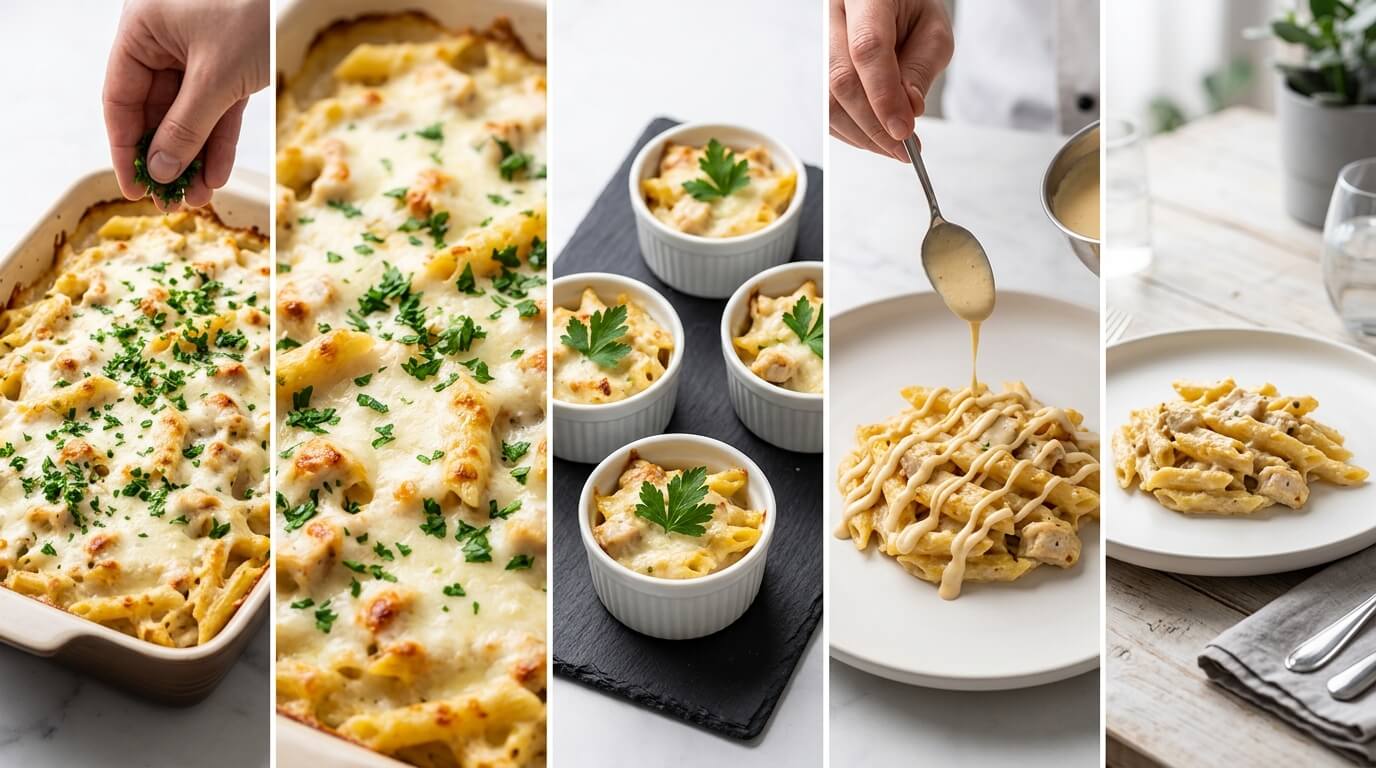
The Herb Garnish: Finely mince fresh parsley and sprinkle it evenly. The bright green contrast against the white cheese makes it look professional.
Individual Portions: For a fine dining feel, bake these in individual ramekins instead of one large dish.
The Final Drizzle: Save 2 tablespoons of the Alfredo sauce and drizzle it in a zigzag pattern over the melted cheese right before serving.
Best Add-Ins for Chicken Alfredo
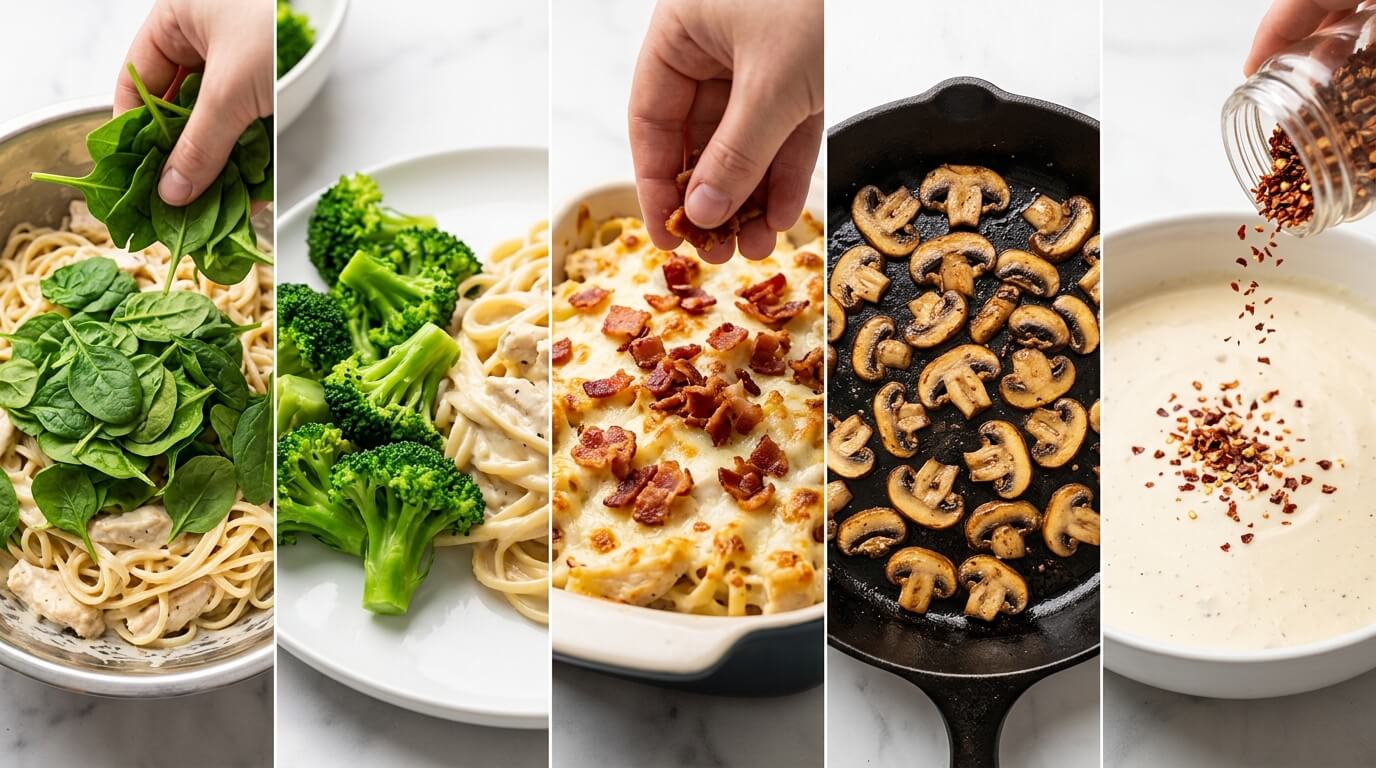
Veggies: Stir in 2 cups of fresh spinach (it will wilt in the oven) or steamed broccoli florets before baking.
Protein: Add crispy bacon bits or sauteed mushrooms for an extra layer of savory flavor.
Spice: Add a pinch of red pepper flakes to the sauce for a subtle heat.
Tips And Tricks
Pasta Shape Matters: Ridged pasta like Penne or Rigatoni wins every time because the ridges "lock" the sauce to the noodle.
Room Temp Dairy: Let your heavy cream sit out for 10 minutes before cooking to prevent the sauce from breaking.
The Broiler Finish: Use the broiler for the last minute to get those professional looking charred cheese spots.
Healthy Swaps
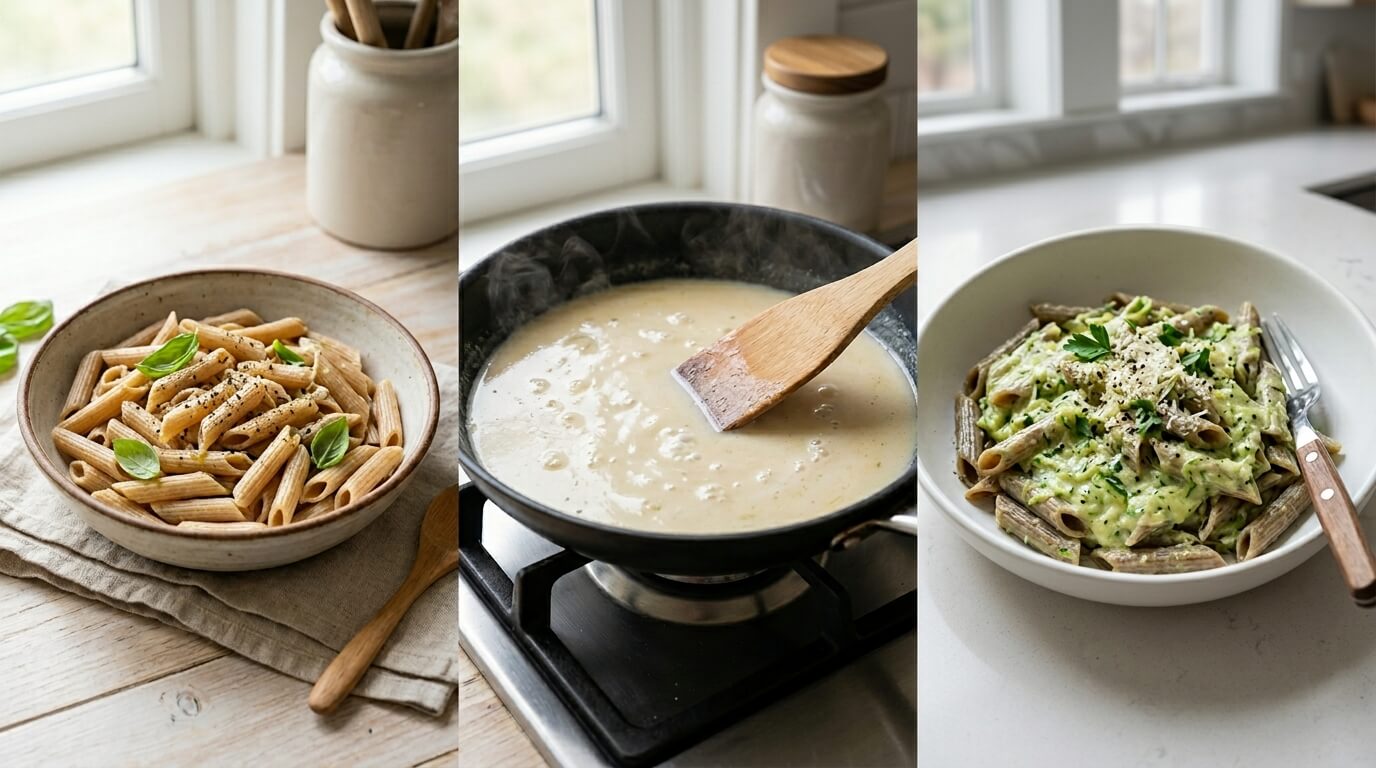
Gluten Free: Use brown rice or chickpea penne.
Lower Fat: Swap half the heavy cream for low sodium chicken broth and use a light mozzarella.
Fiber Boost: Use whole grain pasta and "invisibly" grate zucchini into the sauce.
Variations (Optional)
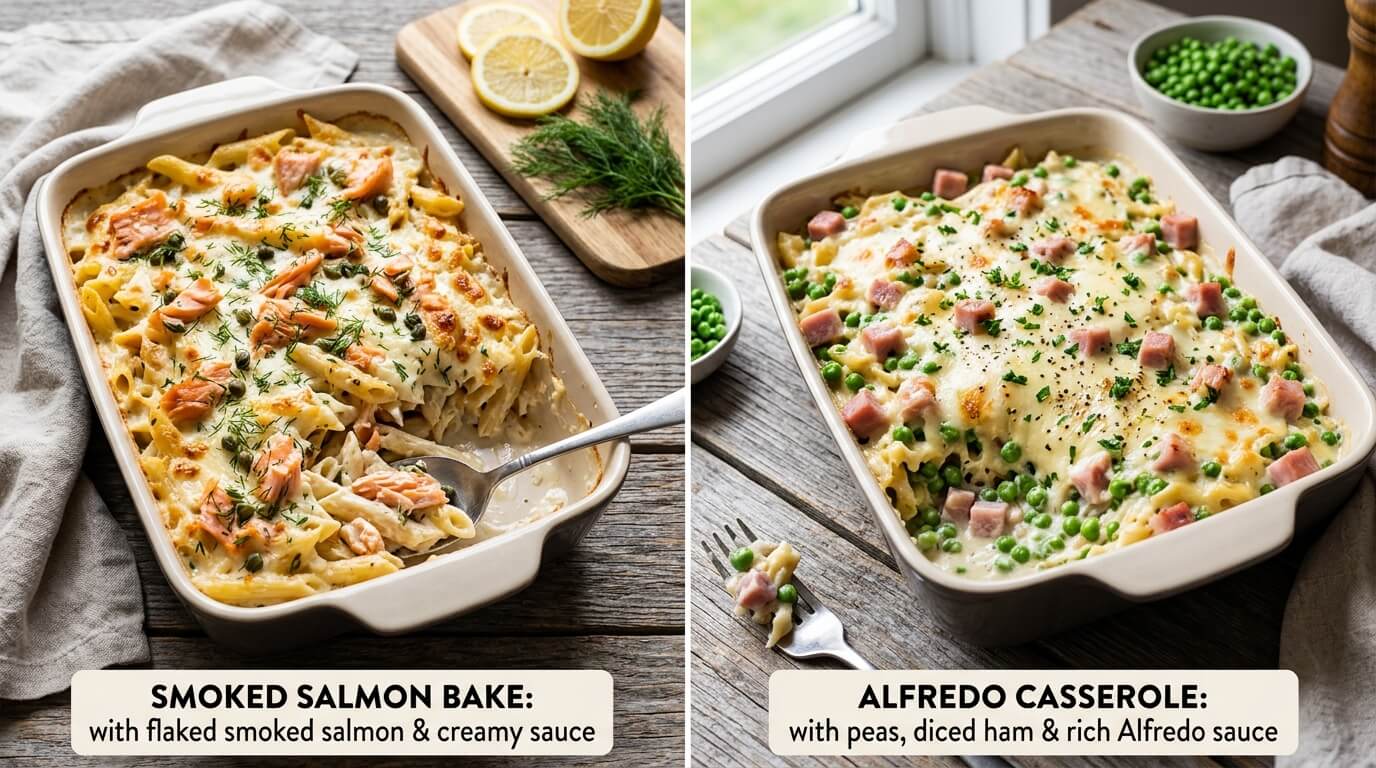
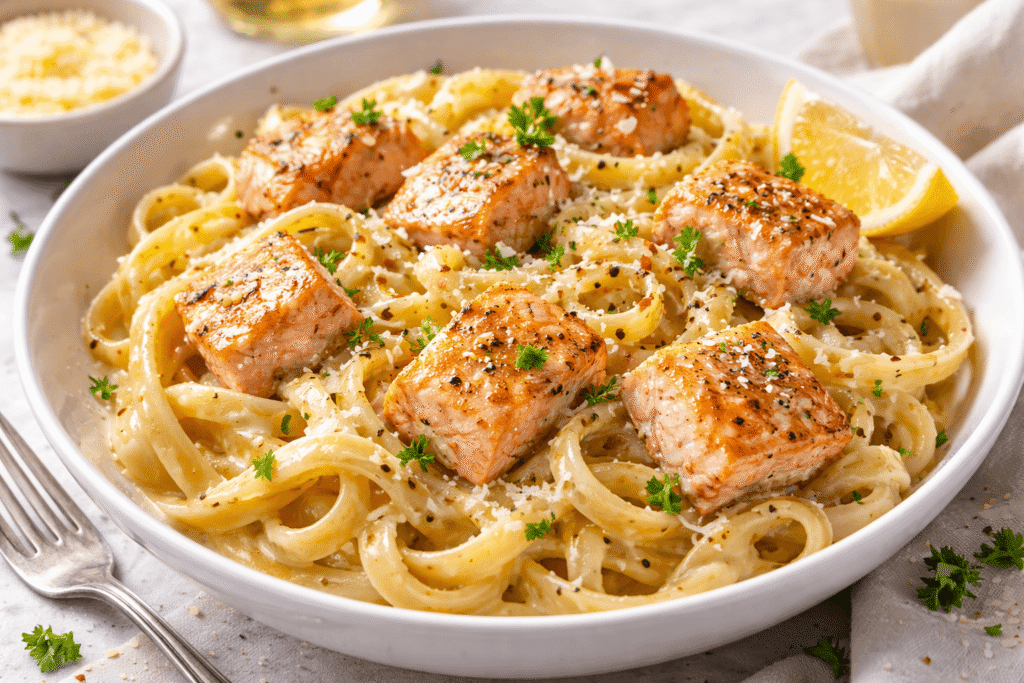
Smoked Salmon Bake: Swap chicken for flaked smoked salmon (add after the sauce is made).
Alfredo Casserole: Add peas and diced ham for a "Cordon Bleu" inspired twist.
Storage, Make Ahead & Reheating
Storage: Keep in an airtight container in the fridge for up to 4 days.
Make Ahead: You can assemble the dish before baking, cover it tightly, and keep it in the fridge for 24 hours. Just add 5 minutes to the bake time.
Reheating: Reheat in the oven at 350°F with a splash of milk to restore the creaminess.
Nutrition (Estimated)
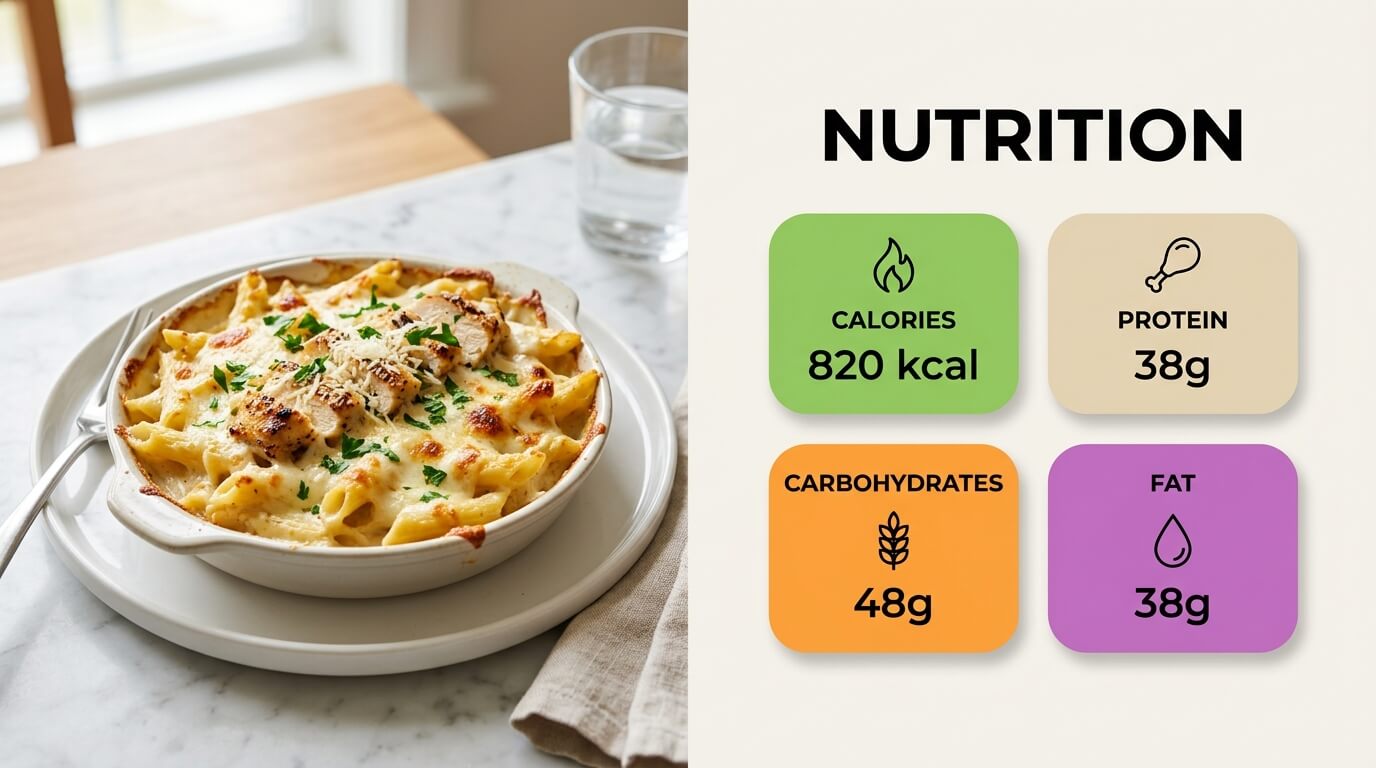
Note: Nutritional information is an automatic calculation and can vary based on exact products used. For precise values, calculate with your specific ingredients